Table of Contents
Webex
Cisco Webex is used as a universal software client for telephony, meetings and messages.
The following supported devices are generally available as hardware:
- Headset C 722
- Cisco Desk Camera 1080p
In justified exceptional cases, a hardware telephone may also be used:
- 9851
Installation
You can download the latest client for Microsoft Windows, Apple macOS, and Linux directly from the following link:
Webex Download
Here you will also find links to the mobile clients for Apple iOS and Google Android.
- Mobile clients for Apple iOS and Google Android must be activated before use. To activate, please contact the HRZ Service Desk. Please let us know whether you are using Apple iOS or Google Android.
Please install the client by following the installation instructions.
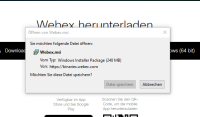
Download the installer.
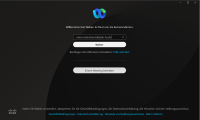
Click the “Finish” button and select the “Launch Webex” checkbox to start the client.

Please agree to the terms of use.

Login
To register for Cisco Webex, please use the email address.
Then please enter your user name and password.
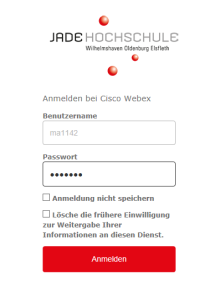
Once you have successfully logged in, the client will be available to you.
Log Out
To log out of Webex, follow these steps in the Webex interface on Windows/Linux/macOS.
- Click on your photo or initials in the upper-left corner with the left mouse button.
- Then select “Log Out” from the menu.
Emergency call notification
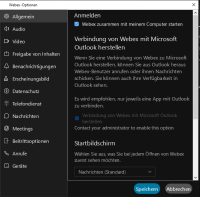
After logging in, a message about emergency call notification appears. This message states the following: When an emergency call is made via Webex, the emergency call center sees the location stored in the area code of the personal phone number. For Jade University, this means that a call made from a location that does not belong to the personal area code will always be displayed with the personal area code at the emergency call center.
- WHV → +494421985XXXX
- OL → +494417708XXXX
- ELS → +4944049288XXXX
Example: You have an area code for WHV and are temporarily working in OL. If you then make an emergency call from your Webex client, this emergency call will be displayed in the control center for the WHV location.
The same applies to an emergency call that you make from your mobile workstation via your Webex client.

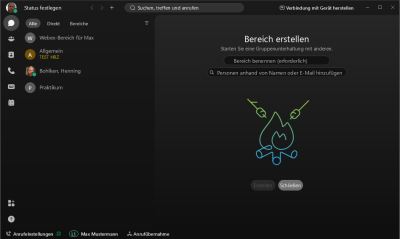
Here you can also set your availability, specify your status, or select the design.
You can also configure the settings for your audio and video devices by clicking on your profile picture.
The settings for audio and the camera can be found in the settings.
The following functions are available on the left side of the Webex Client:
- Messages
- Meetings
- Calls
- Whiteboards
- Contacts
- Voice mailbox (available to all)
- Vidcast
- Teams
Settings device-independent
Basic settings can be configured at: https://user.webex.com. The following settings options are available at this link:
- Voice mailbox
- Call settings
- Meetings
Here you can see the interface after logging in at the link above.

Left menu for navigation in the User Hub

Setting up the camera and headset
To use the softphone in Webex on a daily basis, it is advisable to configure the hardware you are using. The following steps refer to Cisco hardware (headset and camera). Devices from other manufacturers are not supported by HRZ.
Camera
To set up the camera for the first time, remove the device from its packaging and attach the camera to your monitor. Then connect the cable to the computer. The camera is now visible in the Webex client under Settings → Accessories. If the camera is connected via cable, “Cisco Desk Camera 1080p” should be listed as ‘Active’ in this view. Under “Advanced Settings,” you can adjust the default settings for the camera image (zoom level, centering). To do this, use the + and - buttons to change the zoom and the arrows to change the centering of the camera image. This setting can then be saved under “Add Preset.” To do this, assign a name to the setting. Then save the settings by clicking Save. The status of the camera can be viewed under “Camera Info.” The firmware is displayed and any pending updates can be viewed.
Headset
For the initial setup, please remove the two boxes from the headset packaging. There are two components in the headset packaging. The small box contains an additional Bluetooth USB dongle and the large box contains the headset and charging cable in a storage bag. There is a second Bluetooth USB dongle in the storage bag. You will find it in the small bag. Remove the headset from the box and connect it to a USB port on your device using the USB cable provided. When you connect the headset for the first time, Webex will start an automatic firmware update. The status of the update is displayed in a small window at the bottom of the monitor. Please take the time to let this update run completely before continuing with the next steps.
Then remove the Bluetooth USB dongle from the small box. The Bluetooth USB dongle consists of two separate parts. The Bluetooth receiver with USB-C connection and a USB A → USB C adapter. To use all functions, please connect the Bluetooth receiver directly to your device. Avoid connecting via a docking station or monitor, as this may impair some functions. After connecting the dongle, perform a firmware update for the dongle as well. Go to https://upgrade.cisco.com/accessories and continue with “Start.” Then click “Next.” Please confirm the browser request in the upper left area by selecting the USB dongle displayed and clicking “Connect.” The browser should indicate that it has found a USB-C dongle. You can now proceed to the next step by clicking “Next.” Now start the suggested upgrade by clicking “Start update.” Once the process is complete, please take your headset and slide the slider all the way up and hold it in this position for at least three seconds. You can then release the slider. The slider should then remain in the middle position. The LED under the slider should flash, as should the LED on the dongle. Please wait a moment until the Bluetooth connection has been established. You will know this has happened when the LED on the dongle changes to a steady blue. The wireless connection is now set up. You can now see the dongle and headset in the Webex client under Settings → Accessories. A round symbol should be displayed between these two devices. This symbol indicates that the headset and dongle are connected to each other. Under Settings→Accessories→Advanced Settings (Headset), you can customize the notifications that are played through the headset. Under Headset Info, you will find general information about the status of the headset. This section also includes the battery status of the headset.
Steps: Setting up the headset
- ZENWorks: Accessory Hub or Laptop via Web browser https://upgrade.cisco.com/accessories
- Select Accessory Apps, then Download for Windows
- Perform installation
- Skip logging in to Accessory Hub
- Unpack the box Contents: Headset, cable, storage bag, USB-C dongle, USB A adapter
- Remove the headset and cable
- Connect the headset to the PC using the supplied cable
- Confirm “Start update” in the lower right corner of the window (this process takes some time; the status is displayed at the bottom of the monitor)
- Only continue after the headset update is complete
- Remove the USB-C dongle from the storage bag
- Connect the USB-C dongle directly to the device (not via the monitor, etc.)
- Open Accessory Hub
- Select “Update firmware” for the Cisco USB-C HD adapter and then confirm again with “Update”
- Disconnect the headset from the cable.
- In the Accessory Hub, select “Start pairing” under USB-C adapter.
- Turn on the headset using the slider.
- Please take your headset and slide the slider all the way up, hold it in this position for at least three seconds, and then release it.
- The LED under the slider flashes and the LED on the dongle flashes until the devices are connected.
- The LED under the slider will light up continuously and the LED on the dongle will light up continuously
After successful connection, the following display should appear in the Accessory Hub:

Camera and headset operation
Camera cover: You can cover the camera lens using the built-in cover when you are no longer using the camera. The cover can be moved to the side.
Turning on the headset: Check the status of the LED below the on/off switch on the ear cup with the movable microphone. For more information on the status of the LEDs, see the next paragraph. If the headset switch is in the lowest position and the LED is off, the headset is turned off.
Headset status (LEDs): The headset has three status LEDs. One status LED is located directly below the on/off switch. The other two status LEDs are located on the outer surfaces of the ear cups below the center. The outer LEDs can only be located when they are lit. When switched on and connected, the first LED should glow green continuously. The two outer LEDs on the ear cups flash red when a call comes in. During a call, the two outer LEDs glow red continuously.
Charging the headset: To charge the headset, connect it to your device using the cable provided. When the headset is turned off, you can check the charge status via the LED below the on/off switch. The LED flashes red when the charge level is low. When the LED flashes green, the charge level is high but not yet full. When the LED is solid green, charging is complete and the headset battery is fully charged.
Answering calls via the headset: You can use the headset to answer calls on your Webex client. To do this, the headset must be switched on and have an active Bluetooth connection. When a call comes in, press the middle outer button on the headset to answer the call. This function is also available when the device is locked.
Putting calls on hold via the headset: Calls can be put on hold during an ongoing conversation. To do this, briefly press the middle outer button on the headset. The caller will then hear music on hold and the call will be put on hold. Pressing the button again will resume the call.
Ending calls via the headset: If you want to end a call via the headset, you can press and hold the middle outer button on the headset for approx. 3 seconds during the call. This will end the call. This function is also available when your device is locked.
Automatic mute: The headset automatically mutes its microphone as soon as you flip up the microphone boom. When the microphone is flipped back down, the microphone is activated again.
Volume up/down: The volume can be adjusted using the + and - buttons on the headset.
Voice mailbox
The settings for your personal voice mailbox can be configured at https://user.webex.com. The following items can be managed in the voice mailbox:
- Managing the PIN for the voice mailbox
- Switching the voice mailbox on and off
- Creating your own greeting for the voice mailbox
- Additional settings for the voice mailbox
Overview of all settings in the voice mailbox

Managing the voicemailbox PIN
To manage the PIN, first log in at https://user.webex.com with your user account.
Then go to the “Settings” menu item on the left-hand side. Then select “Calls” and then “Voice mailbox.”
 You are now in the menu for your voice mailbox.
Under the item “Voice mail PIN,” you can assign a PIN. After assigning the PIN, you must save the setting.
You are now in the menu for your voice mailbox.
Under the item “Voice mail PIN,” you can assign a PIN. After assigning the PIN, you must save the setting.

Activating and deactivating the voicemailbox
You can activate and deactivate the voicemailbox yourself. To do this, log in to https://user.webex.com. Then go to the “Settings” menu item on the left-hand side. Next, select ‘Calls’ and then “Voice mailbox.”
You are now in the menu for your voice mailbox.
Under the Voice mailbox entry, move the slider so that it is highlighted in blue and a small check mark appears in the slider.
Then click on Save on the right.

Personal voicemailbox greeting
Under the “Forward calls to voicemail” setting, you will find the option to create your own greeting for your voicemailbox.
Select the “Custom message” setting under this item.
You now have the option to record your own message by clicking on “Record message.”
 Start recording by clicking on the round red button on the left. If necessary, make sure you have the required permission for the microphone.
 The recording in progress looks like this:
 Then assign a name to the greeting and select “Save.”
 Now you must save the settings you have made once again.
 You have successfully completed the setup of a personal voicemailbox.
Call forwarding
You have the option of setting up call forwarding to another phone number in the client. This setting is configured in the Webex client. Open the settings at the bottom left of the client. In the Settings window, select “Calls” from the menu. Under “Call forwarding,” you can enter phone numbers that will be available for call forwarding. Here, you can forward calls to voicemail or add new phone numbers. To do this, select “Add number.”
The phone number must be entered in full format:
- Wilhelmshaven +494421985XXXX
- Oldenburg +494417708XXXX
- Elsfleth +4944049288XXXX
After entering the phone number, you can add additional phone numbers. You must select Save before closing the settings.
Overview of settings
 Example of a phone number
 Once the phone numbers have been entered and the settings saved, call forwarding can now be set up flexibly via the standard view of Webex. To do this, go to “Call Settings” at the bottom left and then to the drop-down menu. Select either “Voicemail” or the desired phone number.
 You can tell that call forwarding is active because a telephone receiver with an arrow is now displayed next to the “Call Settings” label.

External calls
To make external calls within Germany, dial +49 instead of zero. For international numbers, dial the appropriate country code.
Monitoring
If a second phone number has been assigned via the “Monitoring” function, incoming phone calls can be displayed and answered on your own Webex Client. If a second phone number is assigned to you via this function during operation, you may need to log out of the Webex Client for the added phone number to be displayed.
Silencing call notifications
If you want this phone number to not ring loudly, but only notify you visually on your computer of an incoming call, the following settings must be made. Open the Webex client. Go to Settings at the bottom left. In the settings menu, go to “Notifications.” This will open the submenu. Select the “Calls” entry there. Then, in the upper drop-down menu in the right-hand window, select the phone number for which you want to turn off the ringing. In the ‘Ringtone’ section below, select the drop-down menu and select the top entry, “Off.” Finally, save the settings you have made via the “Save” interface. You can now exit the menu.
Questions
If you have any further questions on this topic, please feel free to contact the ticket system at https://servicedesk.jade-hs.de/otrs/customer.pl.